Fabrication Tips
Introduction
Probably the first question that should be addressed for a car computer is, "Where am I going to put it and how am I going to interact with it." Perhaps however you are like me and your first questions turns out to be, "How can I play GTA Vice City while driving." Either way, you have to consider where you will put that screen. For the most part the computer itself can be tucked away somewhere so the enclosure does not have to be beautiful, but the screen is a whole different ballgame.
I quickly decided excactly where I wanted my screen, the only problem being that it happened to be exactly where my heating / AC controls and stereo already were. Boo! It was impossible for me to accomplish the install I required without doing some drasitic remodeling of the dash. I choose to go with fiberglass to accomplish this
Fiberglass; Better than Duct-tape?
Of course not! Nothing could be better than duct-tape for any project, but fiberglass comes close :) Fiberglass does have some important advantages:
- Professional look when you are done (maybe)
- Thin, lightweight
- Easily sanded
- Strong
- Relatively easy to get the exact fit you want
- All things considered its relatively cheap
- The resin starts to smell good after a while
Of course it has its dissadvantegs also
- Holy s*#t it takes long time to get it right
- The resin starts to smell good after a while
Perhaps someday I will make a fiberglass resin scented candle. Until I perfect my fragrence that has no head-ache after effects, make sure to do your fiberglassing in at least a semi-ventilated area. I did a lot of it in my bathroom with the vent on.
General Fiberglassing Technique
I image that everyone has their own way of creating the perfect fiberglass part. This worked great for me but is by no means the only way to do it:
- Strech your starter material over your form
- Apply your first coat of resin, let it cure
- Apply another coat of resin, let it cure
- Remove the fiberglass piece from the form
- Apply a coat of resin, followed by a layer of fabric, followed by another coat of resin. Repeat as desired
- Fill in gaps with resin
- Sand the surface, clean it, apply another coat of resin. Repeat as desired
Doesnt sound to bad does it?
1. Strech your starter material over your form
The general principle for the starter material is to strech some fabric into the shape that you want your finished peice to have. I have found that an old t-shirt is the best material for this bar-none! T-shirts are somewhat elastic, have a fine pattern, and are cheap. I always try to use a t-shirt for my first coat of material. After that, I apply more material to the back (read, unseen) portion of the fiberglass piece until I have achieved the strength I want. The t-shirt is still the top most visible layer. After a couple of rounds of sanding and re-applying resin, the t-shirt shell looks fantastic.
Whaterver your material, you must have something to stretch it over. Also you must try to keep it as taught as possible in order to avoid ridges in the hardened resin that take a lot of sander later to get rid of. I have found it is vastly easier to stretch some material OVER an object rather than INTO an object. For example, its easier to stretch material over the outside of a basketball than trying to curve the fabric to the inside of that same basketball.
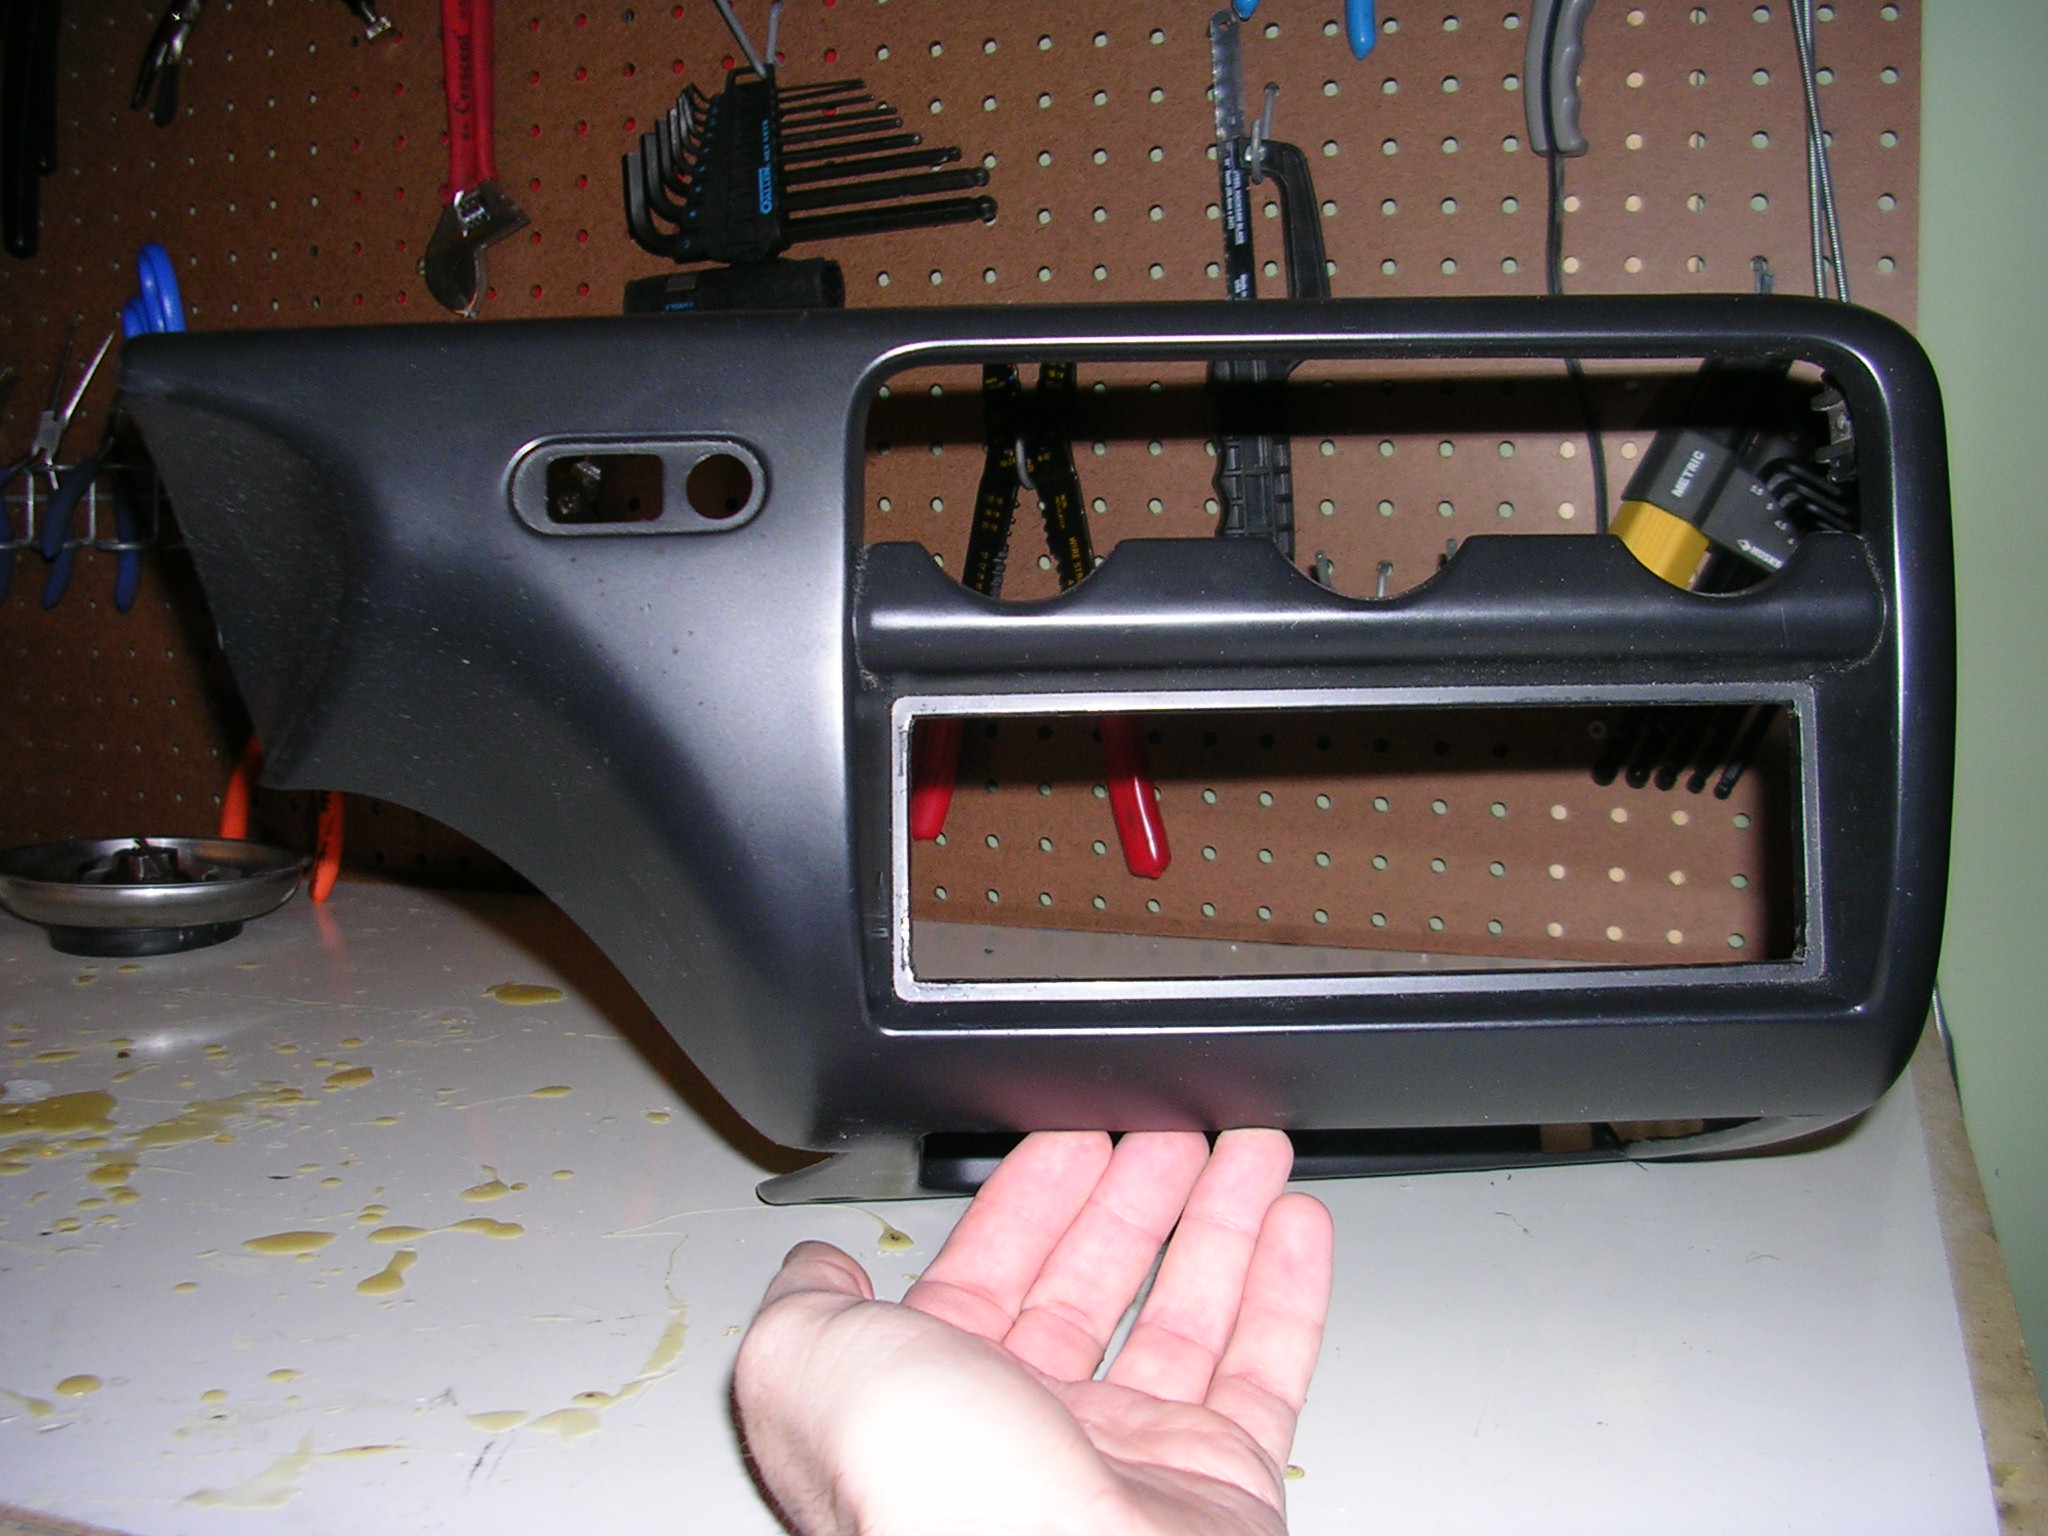
Unfortunatly I did not have a digital camera at the time I did the fabrication for the main dash piece. Look at the following pictures and imagine that I streched materials over the face of this plastic piece. I then secured the excess fabric behind the main face of the plastic piece using safety pins (these are INVALUABLE). I made sure to put plenty of tension on the material. That resin is heavy and as soon as you start applying it to your material, your fabric will start to sag because of the weight and moisture.
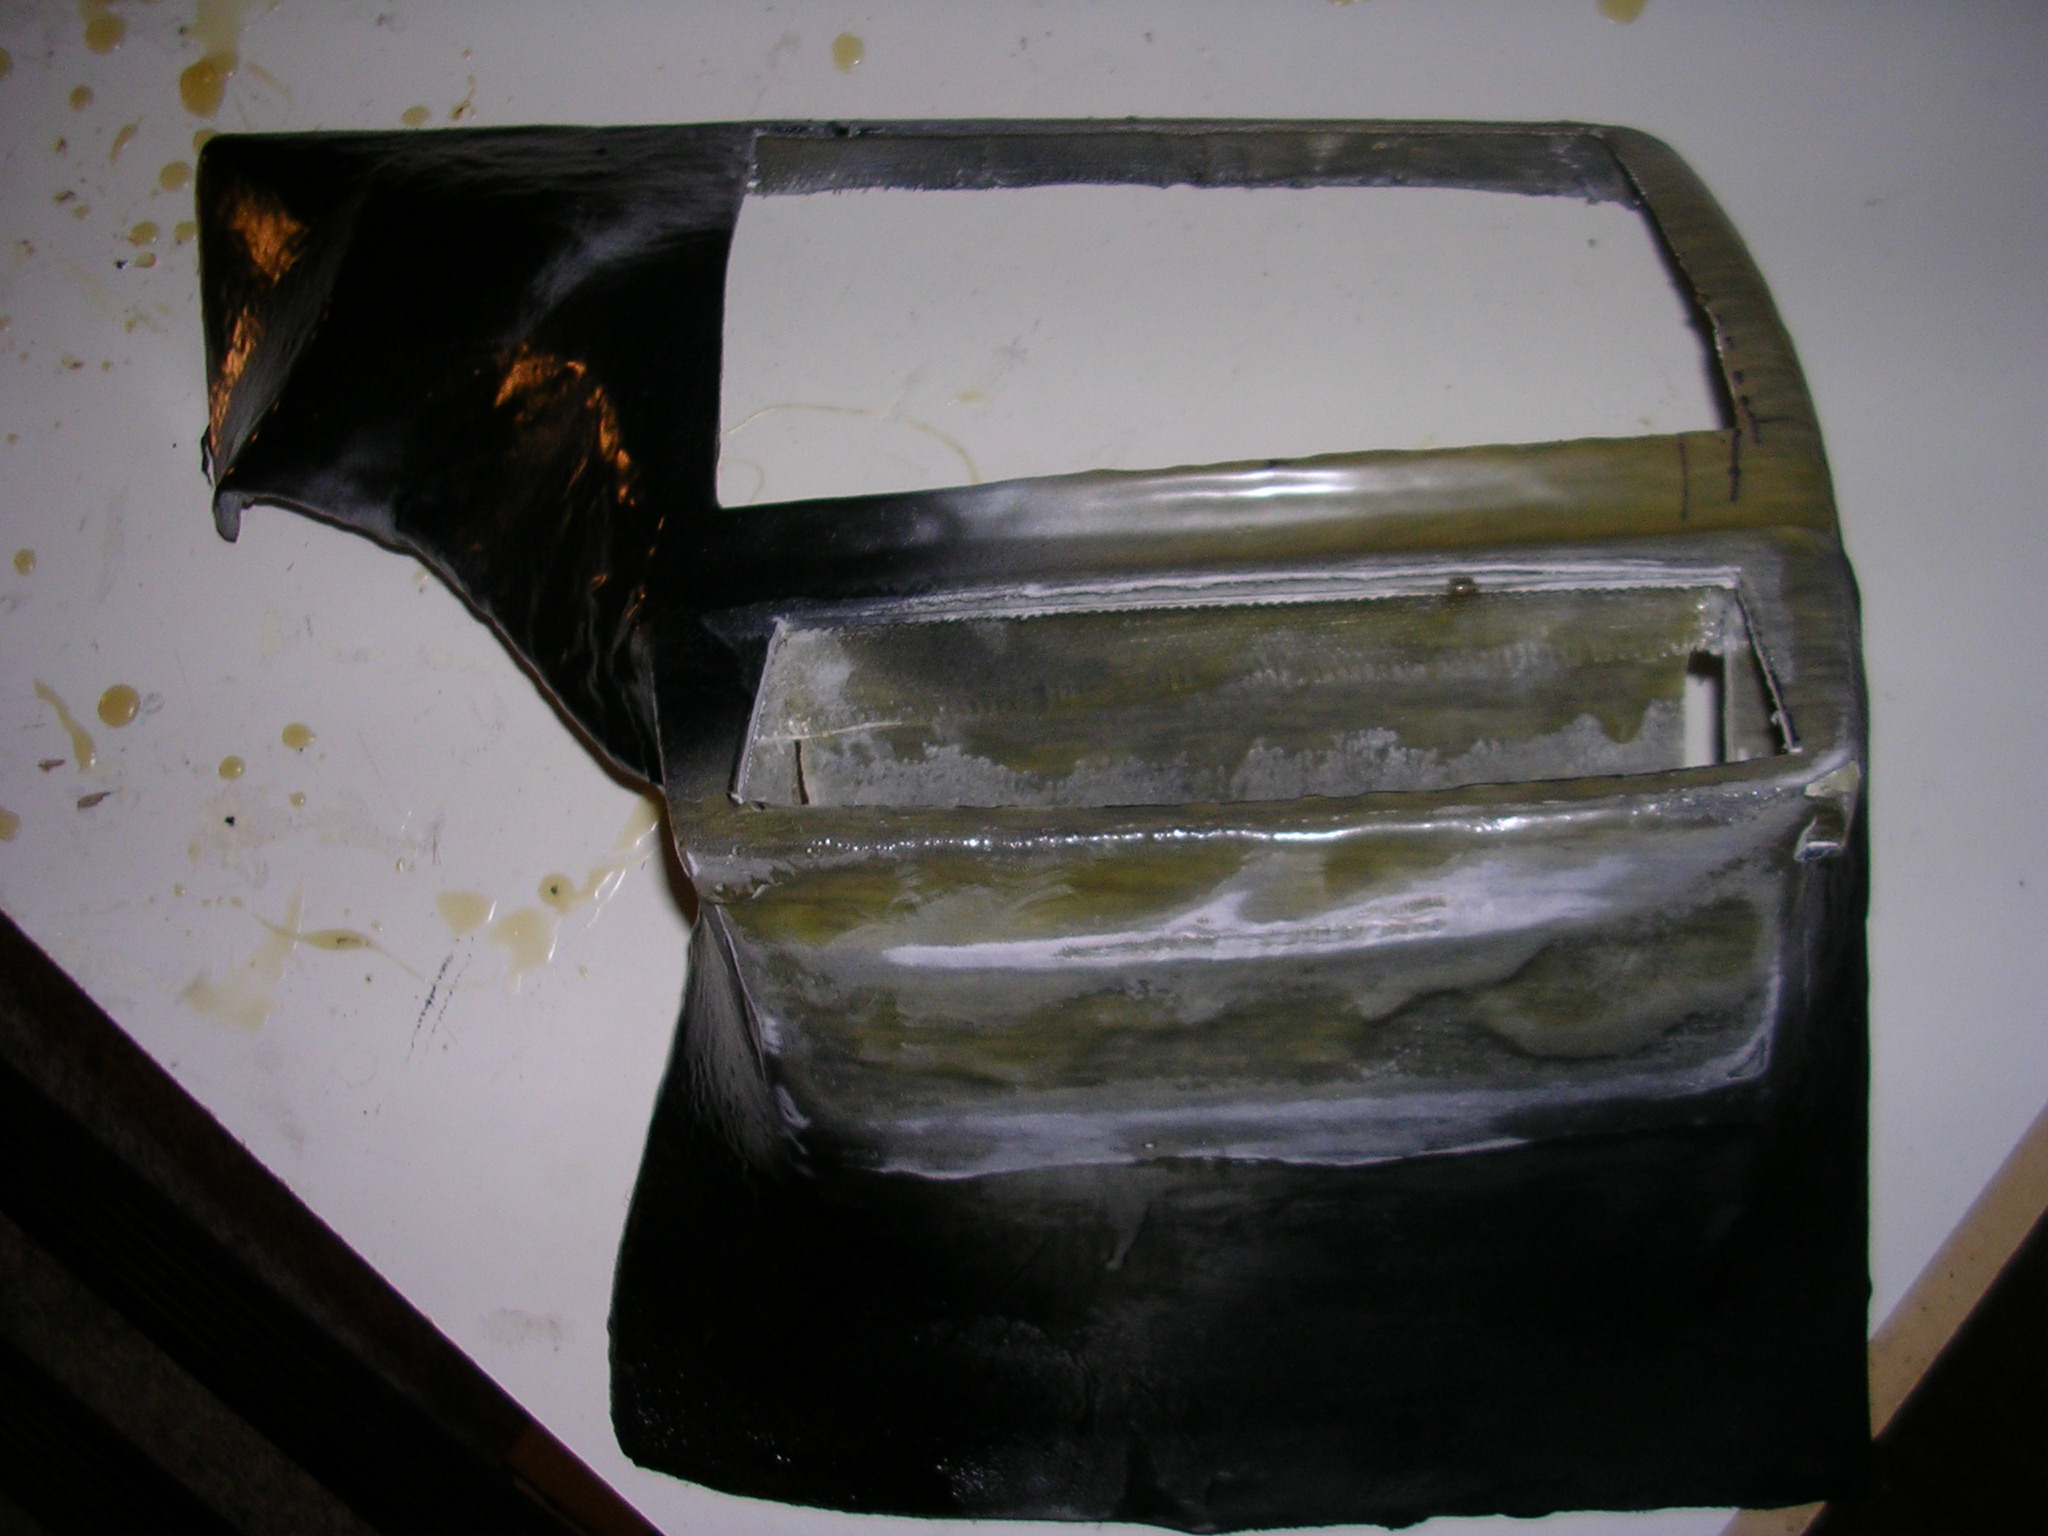
That brings me to my next main idea: Dont plan on adding more sections to your fiberglass pieces later. To to incorporate as much of the finished detail as possible into the form you stretch your material over. This will save you considerable time later plus it will look the best. In the picture above, I planed to add a section where my hand is for the stereo unit. I first tried to stretch my material over the above piece and resin it. Once it had dried I tried to add the stereo section later. The results were disaterous. Here is are some pictures:
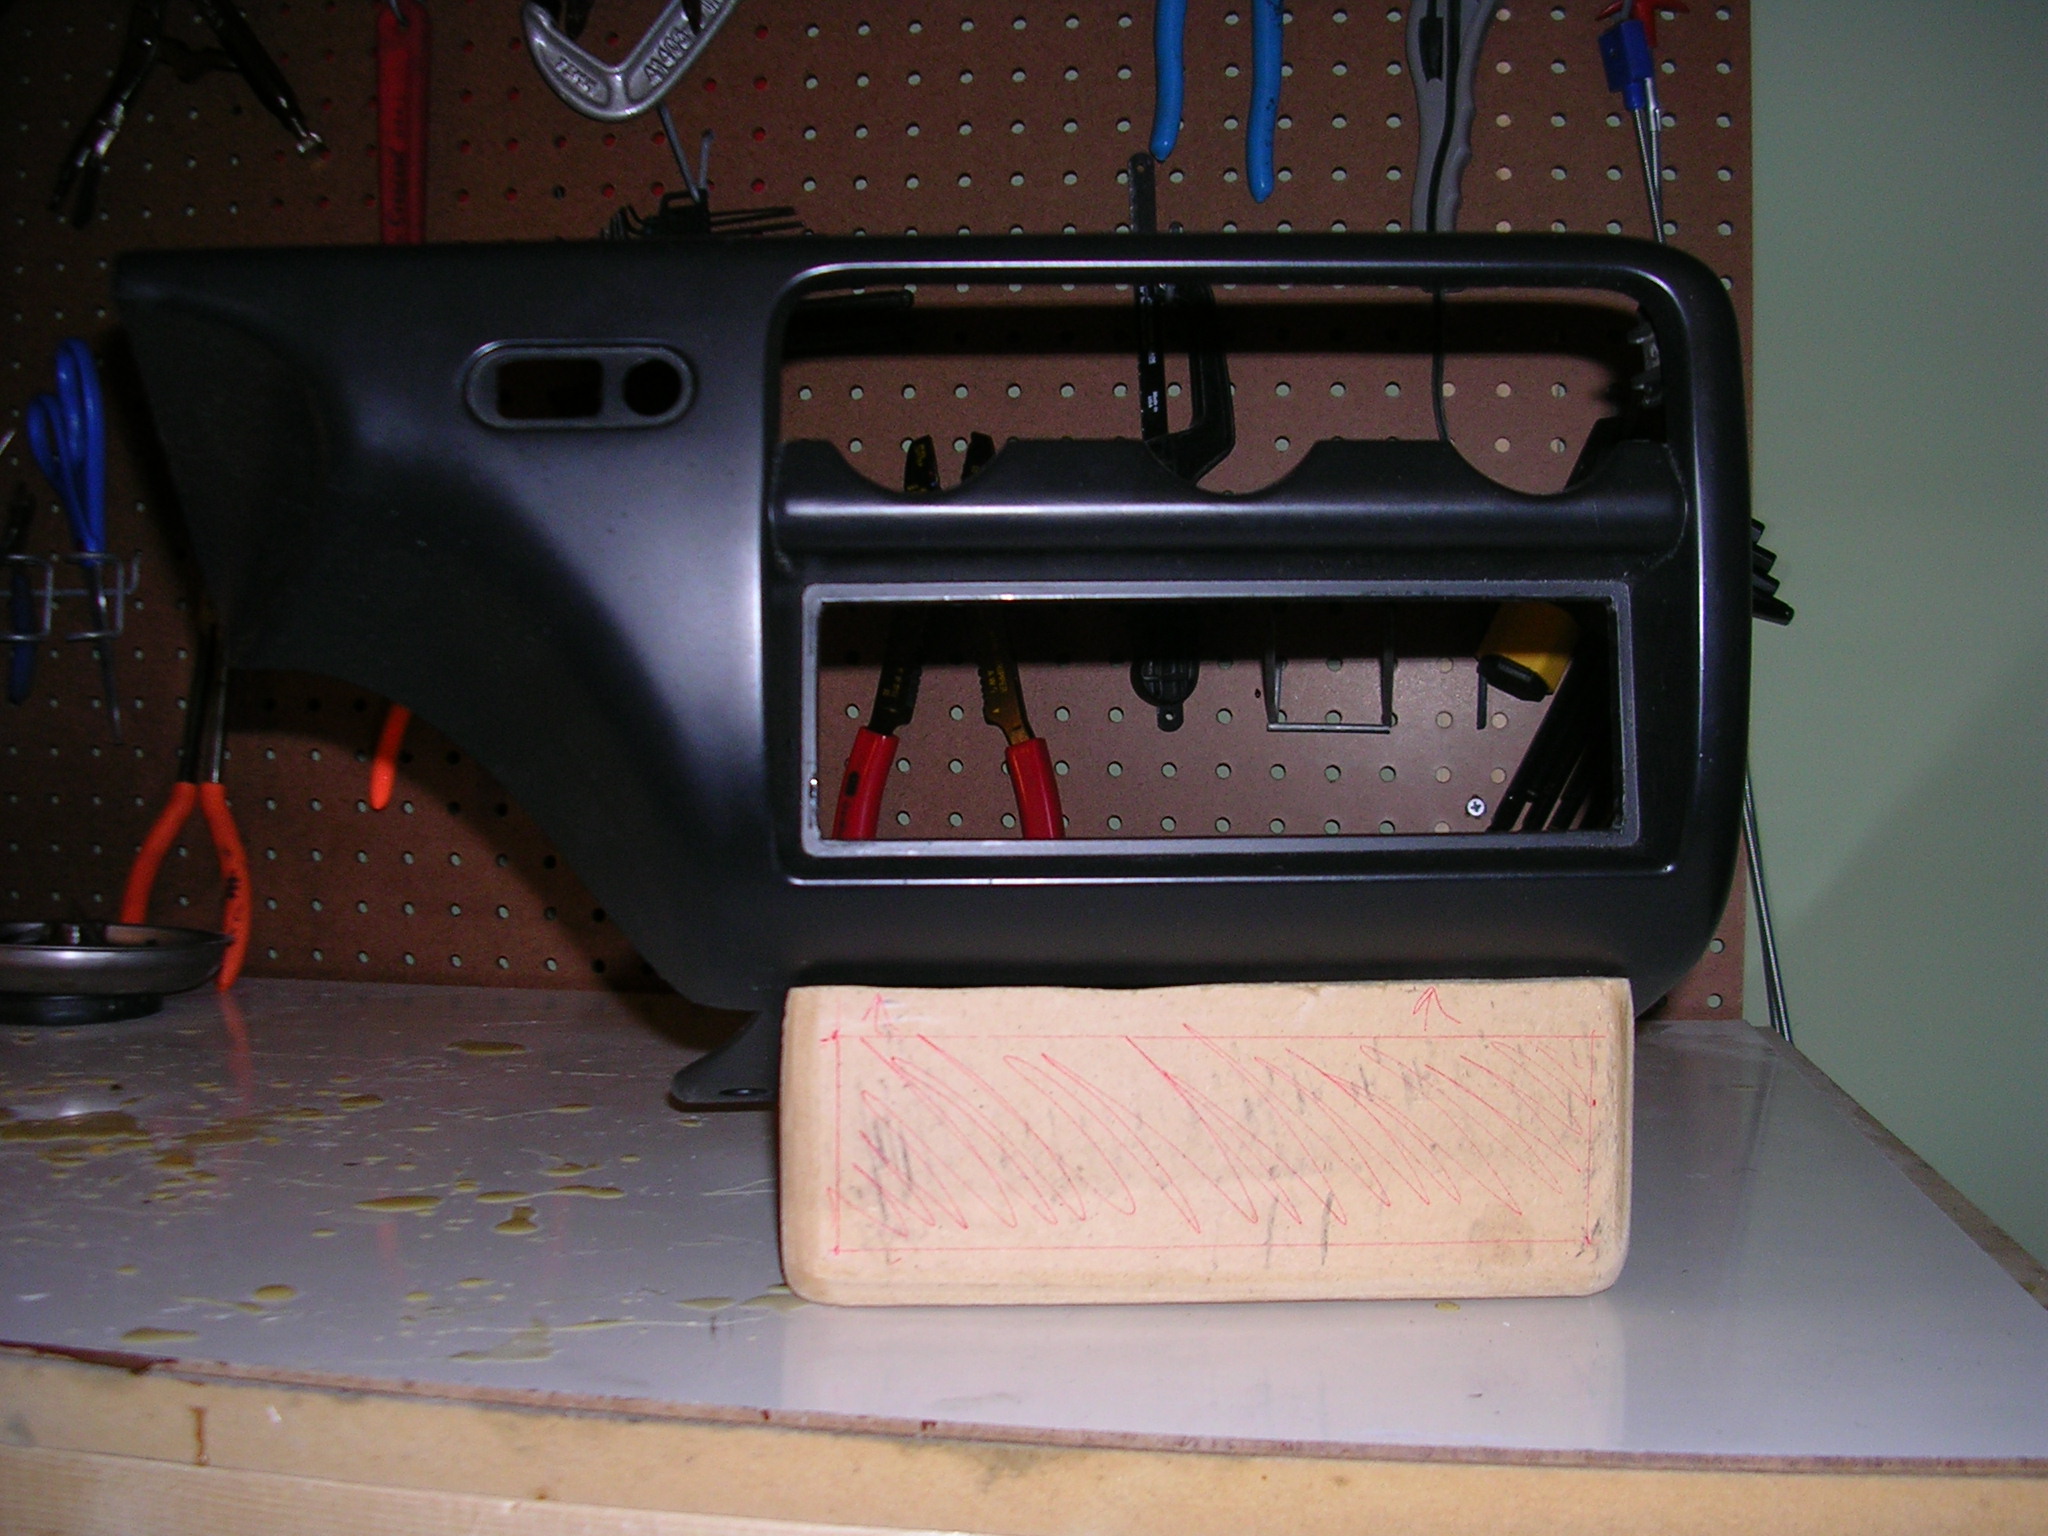
Rather than wind up with a piece like the one above, I recommend adding as much of the finsihed detail as possible to stage 1. In order to do this I make a pho-stereo out of wood. I sanded it as I wanted the finalized fiberglass piece to look. I then attached to two pieces and stretched fabric over the two of them together. The result was a vastly better looking final fiberglass piece. Below is the picture:
It may be hard to notice in this picture however the fabric would not stretch flat across the face of the pho-stereo wood piece. Instead it streched from the bottom to the front face of the existing plastic piece, meaning it pulled away from the top of the pho-stereo face by fully a 1/2 inch. To fix this, I simply ran a bead of hot-glue along the top of the pho-stereo face. I streached my fabric as normal but adheared the t-shirt material to the wood via the hot-glue. Hot-glue is also invaluable to step 1 as it allows you to accomplish shapes that are impossible by normal stretching methods. Unfortunatly, hot-glue does not soak up resin so it also adds some weakspots to your fiberglass piece. Oh well, its worth it.
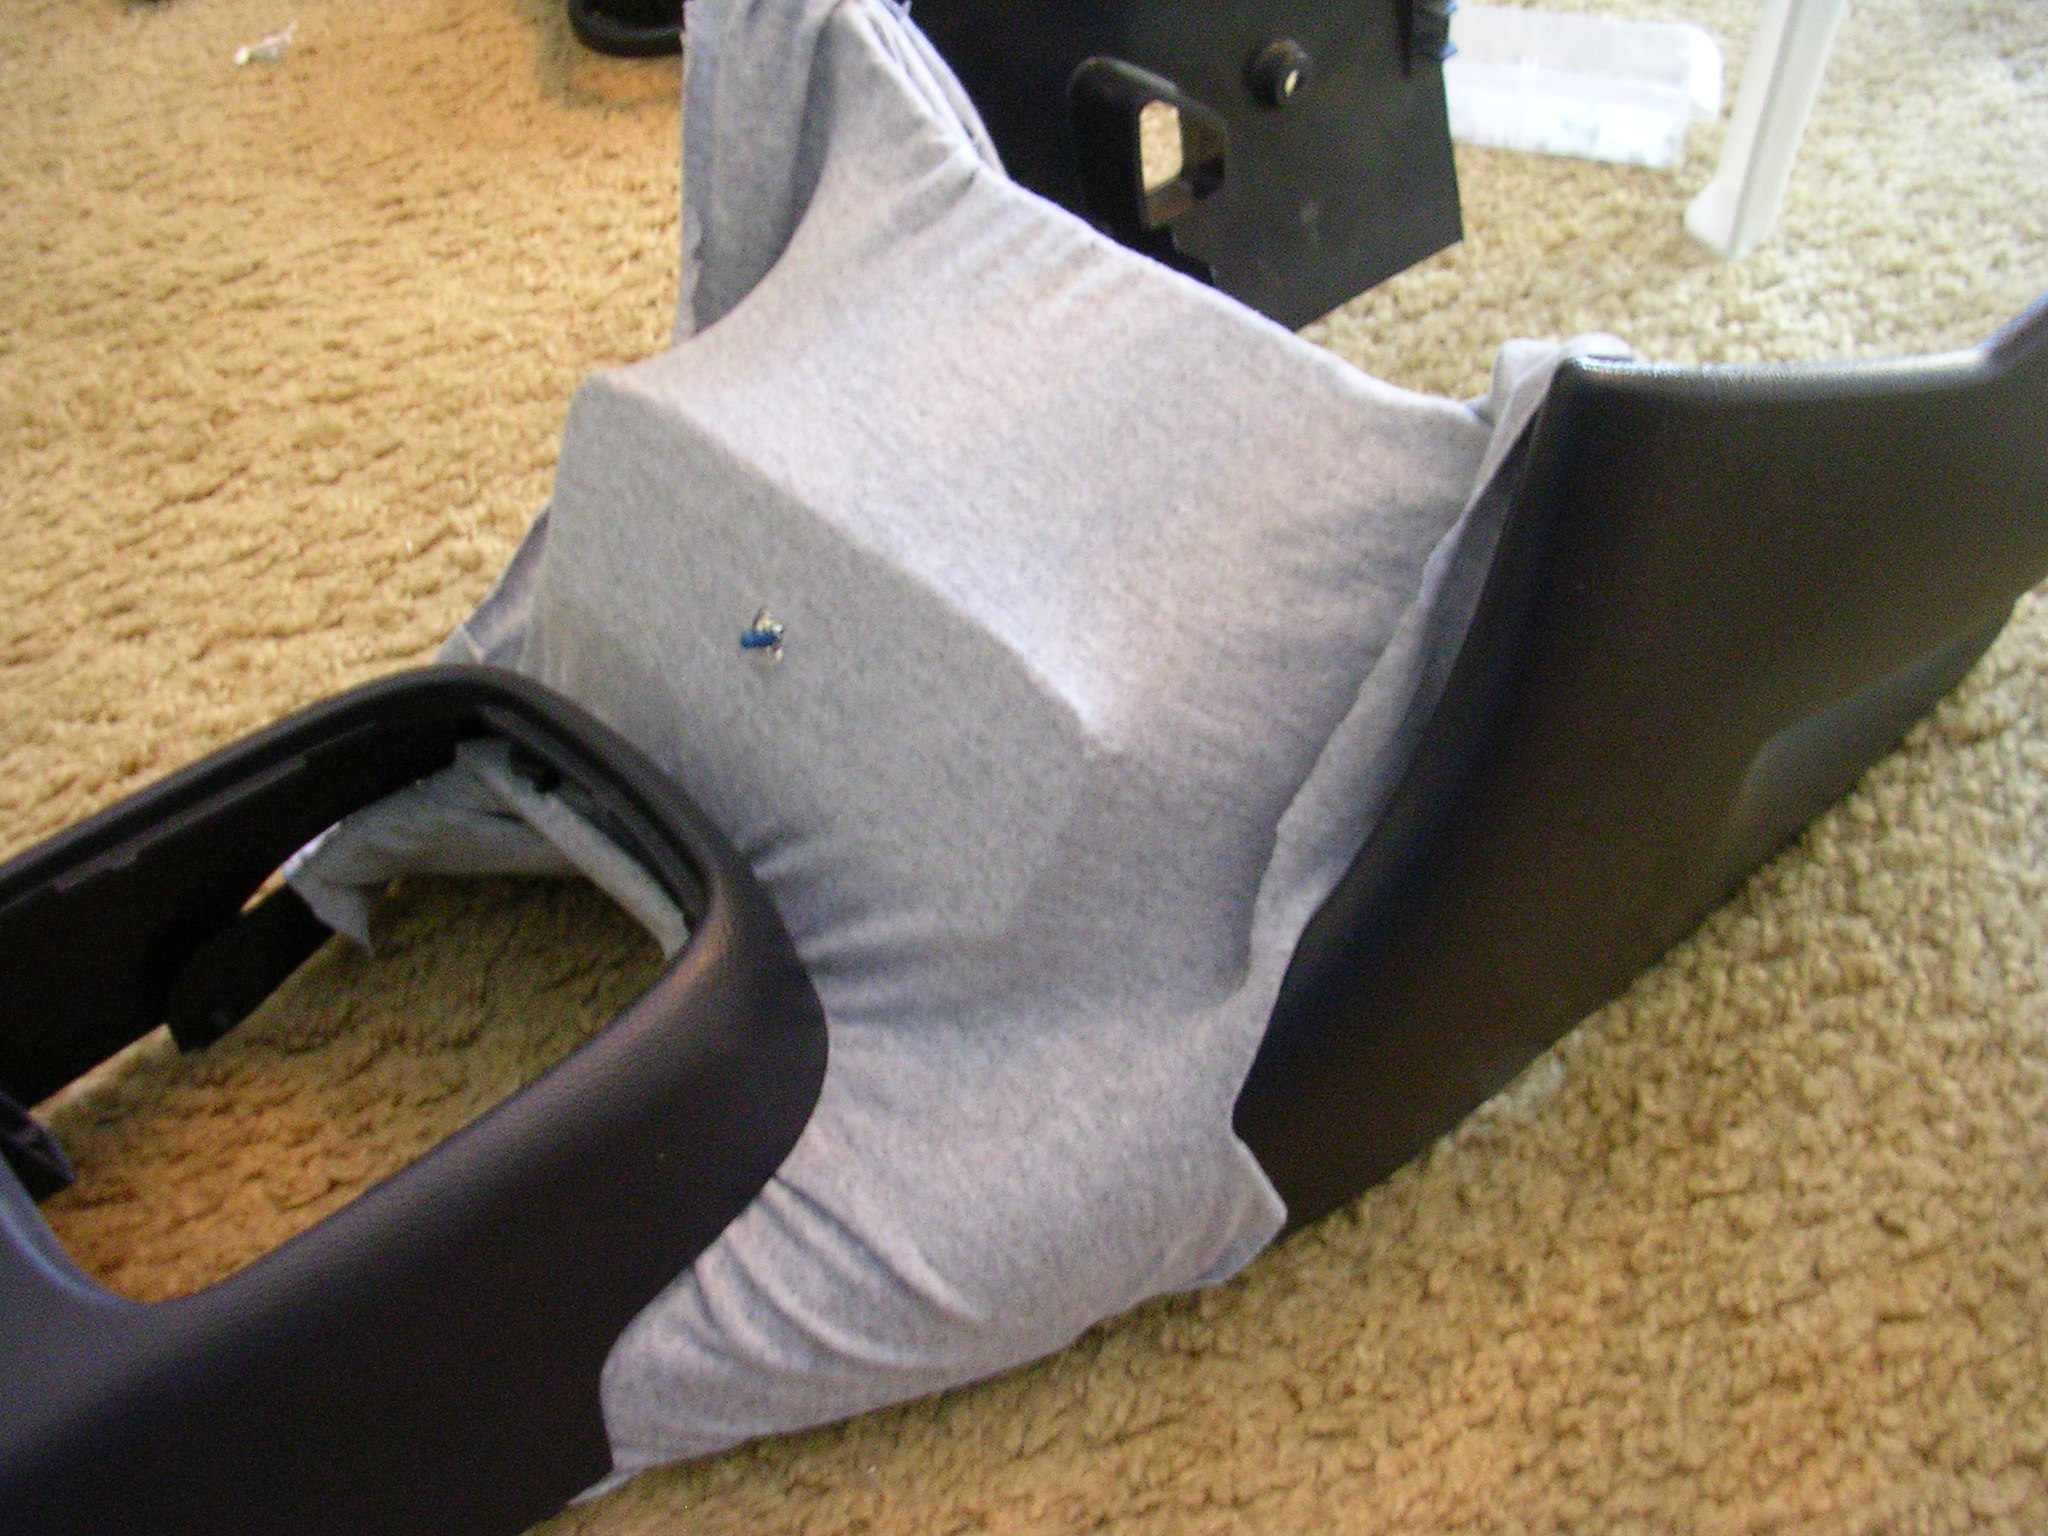
Earlier I had said it was easier to stretch fabric over something rather than in it. Here is an example of me trying to strech fabric into something. I had to make extensive use of hot-glue and safety pins:
Do you see all the folds in the material? Guess where this piece ended up, the trash. For the next version I spent much longer getting all the folds out. By the way, this piece will eventually hold my displaced heating and A/C controlls. Bye bye cup-holders!
2. Apply your first coat of resin, let it cure
Not a lot to say on this step. I recommend using foam painters brushes to apply the resin. No matter how nice your brush is, you can only use it once when fiberglassing. These foam brushes are about as cheap as you can get. Also, cheap brushes with bristtles (rather than foam) will always drop fibers onto your prized fiberglass piece. This is really irritating, so do yourself a favor and use foam brushes. Lowes and Home Depot sell them for about 70 cents a piece. You will need lots of them.
3. Apply another coat of resin, let it cure
Same rules apply here as apply to step 2. You are just trying to build up a little more strength in the fiberglass piece before removing it from the form. Even after this step however the piece will be very weak.
4. Remove the fiberglass peice from the form
Sharp scissors and / or a dremmel tool can really speed up the process here. Where ever possible, try to wrap your form in tinfoil before wraping it in material to make removing the fiberglass piece easier later. Resin does not stick to smooth surfaces. My center dash piece is smooth plastic such that tin foil was not really needed, but better safe than sorry. Try to keep your tinfoil as wrinkle free as possible. The more wrinkled it gets the more likely the resin will bind to it. It is not really a big deal if some tin foil makes it way into your final fiberglass piece (unless strength is an big concern).
5. Apply a coat of resin, followed by a layer of fabric, followed by another coat of resin. Repeat as desired
From this point on, I start adding on layers of fiberglass matte for strength. I will coat the unseen portion of my fiberglass piece in resin. I will then quickly place a piece of fiberglass matte down on and push it into place. Wearing latex gloves can allow you to be manually precise will still cleaning up quickly. Nothing is worse than trying to get semi-dry resin off your hands.
Try to keep the pieces of the matte as large as possible. One thing I hate about the matte material is that it does not bend or stretch for s%#t. Corners can be a big problem. Luckily you are applying to the part of your piece that does not have to be beautiful.
Once you have pushed your matte into place, immediatly apply another coat of resin over it.
Add more layers as you see fit. I have found that 1 t-shirt layer and 3 fiberglass matte layers is very strong. With only 4 layers my piece did not break when I accidentally stepped on it. Whenever possible, try to offset the angle at which you lay down your matte. This will increase the regidity of the part. For example, if your first matte layer has a weave pointing at 0 degrees and 90 degrees, put your next layer down so that it's weave points at 45 degrees and 135 degrees. I hope that made sense.
6. Fill in gaps with resin
You may notice that your outer shell has some waves or depressions in it. If this is the case, its easily solved by filling in those gaps with straight resin. For some detail work it seems impossible (or at least way too hard) to resin fabric. For this kind of small detail work I like to pour resin into some sort of form I have created. The best example is looking at the rounded inner-corners of the screen shroud pictured later on the page. I could not make the corners look good using fabric so I ended up making a perfectly square surround for the screen and ended up rounding the corners by pouring resin into molds made out of tin foil. Besides tin foil, masking tape works wonders for this.
7. Sand the surface, clean it, apply another coat of resin. Repeat as desired
Aside from step 1, this is the most important part. After you have applied your resin, the resulting surface will be very rough and uneven. Sand it down, aggressivly. Try not to sand down to the t-shirt material though. After sanding, apply another coat of resin. Keep repeating you will keep getting a smoother and smoother surface that better matches the plastics found in cars. Also you will be able to repair imperfections during this time. Sand off those ridges you created during step 1 (and there will always be some of those) and fill them in with resin, then sand them smooth again.
Before this step its hard to believe that your piece will ever be allowed in your car. After sanding and refinishing, you wont believe you did it and not a professional!
|


