|
The upstairs bathroom has been in rough shape since we moved in. At that time, it was the only bathroom in the house so we were not about to start a remodel. Once the basement bathroom was complete, we could finally turn our attention to the upstairs bathroom.
The real problem with the bathroom was the shower walls. They were falling appart. Tile was falling off the wall and the wall itself was mushy. It was bad when we moved in, but got worse over the years. In the back of my head I knew that once I started tearing into the shower walls we would end up remodeling the entire bathroom, and that is exactly what happened.
The bathroom was stripped down to bare studs and the original floor. Everthing was replaced, plumbing, electrical, mildew infested studs, subfloor under the tub, all the fixtures, the list goes on and on.
In the end, I am glad we did it. It took a whole lot more time that I had hoped. It was even more expensive than I planned, but not significantly. The total bill end up at $1800, not including the cost of our time to install everything. That is not bad considering everything you see in the bathroom is brand new.
The new color scheme is far brighter and more airy than before. We went to great lengths to make the bathroom feel larger than it is, and I think it works very well. Movies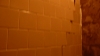
old tile backing- drywall.mp4 (30.3MB)
Pictures
Preview Image Size
| | | | | | | | | | | | | | | | | | it was not even close to level | | | | | | | | | | | | | | | | | | | | | | | | | | | | | | | | | | | | | | | | | | | | | | | | | | | | | | | | | | | | | | | | | | | | | | | | | | | the old medicine cabinet hole had to be enlarged for the new medicine cabinet | | | | | wall paint color, olive wood | | | | | | | started installing new base boards | | | | | new sink will partially cover air vent, just like old sink | | | | | | | | you can also see foam in air vent, trying to make it more efficient | | | | | | | | | | In order for sink to sit flush the vanity must be 1/2 inch off wall, DUMB!! | | | | | | | removed lower window trim to make waynescot easier to install | | | | | | | | | | vanity moved off the wall to allow sink to sit flush | | | | | | adding eletrical outlet to left of the vanity | | | | | | | | | | new medicine cabinet installed, it was tough getting waynescoting cut just right | | | | | | | | | | | | like Baily, Henry is also obsessed with getting into boxes | | | | | | | | | | | | | | | | not sure why Bailey is trying to crawl under our drop cloth | | | | | | My lack of visible butt crack indicates I am not a professional plumber | | | | | toilet installation complete | | | | | | plenty of space in between toilet and sink, more so than before | | | | | | | | | | | | | | | | | | | | | | support for glass is screwed into wall, very strong | | | | | | bottom support is tapped to tile, no holes so no water leaks | | | | | channel in place, ready for glass to slide in | | | | | | | shower rode will pressure fit glass, add some caulk on glass channel and we are done | | |
